Green Screen Wizard Pro Studio with Editor is the most powerful green screen software solution that we provide. Green Screen Wizard Pro Studio with Editor is a self-contained chroma key removal program that does not require Photoshop or any other photo editing applications to produce beautiful green screen photos.
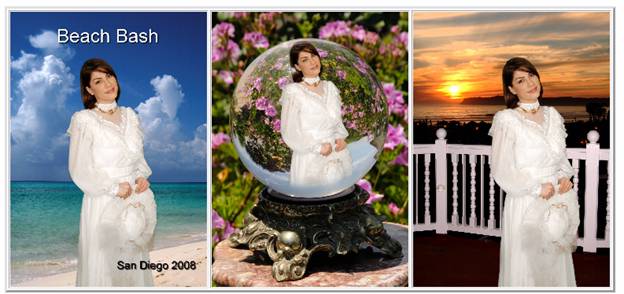
Green Screen Wizard Pro Studio with Editor is intended for people that demand the greatest flexibility in green screen photography. Green Screen Wizard Pro with its Sandwich Overlays, Shadow Generators, Special Effects and the new Airbrush Editor can provide professional photographers a platform for doing business. The Pro Version offers five layers to create amazing images and supports the sandwich overlays. It has a full annotation capability that will let you put as much text as you like on your images. With this feature you can create advertisements or your own magazine covers. Green Screen Wizard adds some new special effects that makes creating artistic images a breeze.
Green screen wizard pro will allow you to create images that your competitors, who are not using green screen, cannot. This will give you a competitive advantage in the marketplace.
Green Screen Wizard Pro Batch expands on Green Screen Wizard Pro by adding automation and e-mail capability. This is particularly valuable if you shoot many photos and would like to process them later or if you're at an event and need to process images very quickly. The Pro batch version also adds an e-mail capability so that rather than printing the images out the images can be e-mailed to your clients.
Version 10 adds the Full Screen Event mode for windows that, like the mac version, does very fast processing of a low resolution image and then will save the image as a high resolution image.
Buy it now, for only $249.95 you will receive a license that can be used for Windows
and Mac
Buy Now $249.95
The GreenScreenWizard interface was designed for people
who'd like to load an image, processes it, and then print it. In this process
the user has to go to a foreground folder and find the image he would like to
load. When it's time to print the image the user has to select the printer
template, then select the printer itself, and then print, and then go back and
repeat the process. While this is a simple process it is not very efficient.
When you're shooting at an event you often will use the camera's tethering
software to bring images into the computer. You'd like to efficiently processes
images. To this end GreenScreenWizard "Event Mode" was created.
For PC:
For Mac:

In version 10 we introduced the full screen event mode. The new system has some key features:
o A tape deck like interface that lets you display and choose your foreground
o When a new foreground image is placed in the foreground folder by the tethering
software the display is automatically updated.
o A tape deck like interface that lets you display and choose your background
o A very fast preview of your final image
o Easily switch from portrait mode to landscape mode
o Separate backgrounds for landscape and portrait mode
o A line of text can be added
o Support of gsw files for overlays and predefined text
o Background processing creates a high resolution output image
o Output can be saved to disk, emailed , messaged to a phone or printed.
Setting Up the Full Screen Event Mode
The full screen event mode uses a dialog box to select:
o The Printer
o The Pringer Layout
o Image Source folder
o Portrate Background Folder
o Landscape Background Folder
o Save Folder

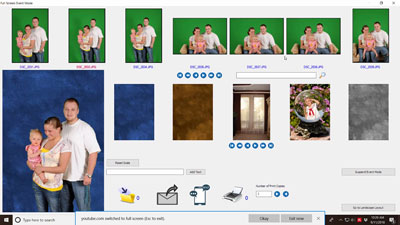
Using the Full Screen Event Interface
The current image size and dots per inch and settings will be used as the default layout.
Once you click the start full screen event mode button the system will start to
load the foregrounds and backgrounds into the system. Once this is done you can start using the system.
The interface is very intuitive. Simple click on a foreground or a background and you will see the display updated.
If you want to move the foreground image simply right click on the display and drage the mouse. If you want to
move the image left click on the display and move the mouse up to scale up and down to scale down.
If you have more the 7 foreground images you can scroll the display using the tape deck style buttons.

You can:
o Move to the first image
o Move back 7 images image
o Move back 1 image
o Move forward 1 image
o Move forward 7 images
o Move to last image
You can also search for an image using text.
To add a line of text, simply enter it in the text window and click add text.
You can use any of the 4 meta tags in your text:
<<filename>> - file name
<<filenumber>> - file number DSC_8801.jpg becomes 8801
<<date>> - Month, Day, Year
<<time>> - Time of day
To delete the text click on it with the mouse and then click the x in the lower
left corner. To change the text font or color click on the text and then click on the edit
symbol in the upper right corner.
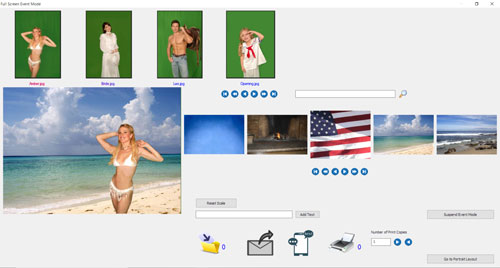
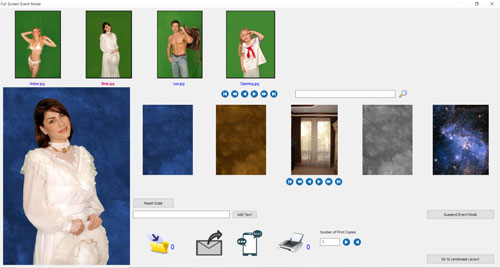
To change layouts click the button on the lower right of the screen.
Portrait Layout
Landscape Layout
Clicking the Suspend Event Mode button, will copy the forground and background to green screen wizard and minimize the window.
You can then use the wizard to change settings and edit the photo.
If you buy the Pro Batch/Event Version of Green Screen Wizard you can automate Green Screen Wizard in a lot of different ways. This is an overview of some of the most common ways.
In this process the images are placed in the Foreground Folder and for every image in the foreground folder there is an image combined with the current setting and background of Green Screen Wizard.
|
|

|

|
|

|
|
Green Screen Image Source Folder
|
|
Batch Process
|
|
Combined Image Output Folder
|
In this process the images are placed in the Foreground Folder and you specify a background folder. Every image in the foreground folder is combined with every image in the background folder. So for example if there are 10 foreground images and 5 background images there will be 50 images place in the output folder.
|
|
|
|
|
|
|
Green Screen Image Source Folder and Background Folder
|
|
Batch Process
|
|
Combined Image Output Folder
|
In this process the images are placed in the Foreground Folder every time a picture is taken with the camera. To do this connect your camera with a USB cable and then run the software that is compatible with your camera to move the photos out of the camera and into the source folder. Run the batch process with the checkbox "Keep Checking for new files checked" that way the batch process will keep looking at the source folder to see if there are any new images to process. The effect will be that every time you snap the shutter an image will be moved to the source folder. The batch process will see it and then move it, process it, and put it in the output folder.
|

|

|

|
|

|
|

|
|
Connect Camera with USB
|
3d party software
|
Green Screen Image Source Folder
|
|
Batch Process with keep checking for new files checked
|
|
Combined Image Output Folder
|
Batch printing allows you to setup your printer and image sizes and then print a folder of images. You may also ask the print process to "Keep Checking for new files" and anytime an image is placed in the folder it will print.
|
|

|

|
|

|
|
Combined Image Output Folder
|
|
Batch Print Process
|
|
Printed Images
|
You can run the Batch Process and the Batch Printing at the same time. In this configuration when you snap the shutter a green screen image will go into the batch source folder. At that time the Batch Process will process it and then put it in the combined output folder. The Batch print process will detect the new file and print it so every time you click the shutter a print will come out.
|
|
|
|
|
|
|
|
|
Connect Camera with USB
|
3d party software
|
Green Screen Image Source Folder
|
|
Batch Process with keep checking for new files checked
|
|
Combined Image Output Folder
|
|
|
|
|
|
|
|
Batch Print Process
|
|
Printed Images
|
Event mode works like batch but it lets you inspect and choose the next image to be processed. In Event mode you can Save an image, Print an image or Save an image to the Combined image folder of the Batch Print process.
|
|
|
|
|
|
|
|
|
Connect Camera with USB
|
3d party software
|
Green Screen Image Source Folder
|
|
Event Mode Process
|
|
Combined Image Output Folder
|
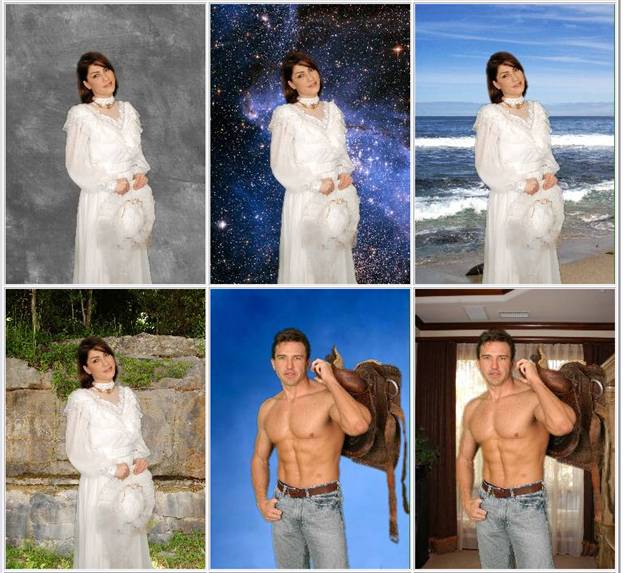
Green Screen Wizard
allows you to take two sets of files, a foreground set and a background
set, and multiply the two together. For example if you had five backgrounds
and three different foregrounds then you would have 15 images when the process was
done.
Green Screen
Wizard Pro stores all of the settings that created a file in the file itself.
Refer to the explanation of GSW files earlier. The batch process can use these files
in three ways. It can take the current image and just change the current settings to those that were used in the GSW file. It can
take the current image and replace the settings and the background, or it can take
the current image and replace the foreground and replace the
Lets try a few examples:
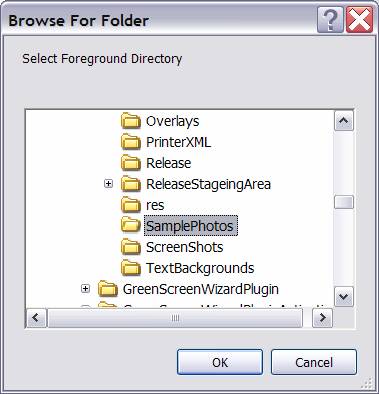
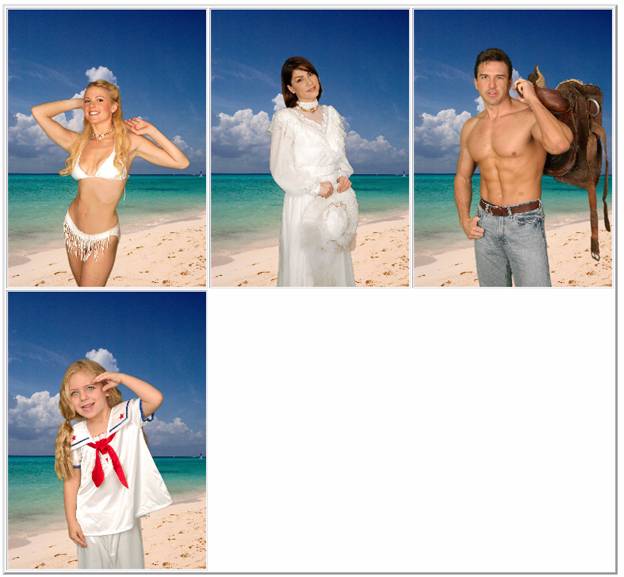
The simplest
example is to take the current image and replace the foreground image in the file.
You would do this, for example, if you took photos of a baseball team and wanted
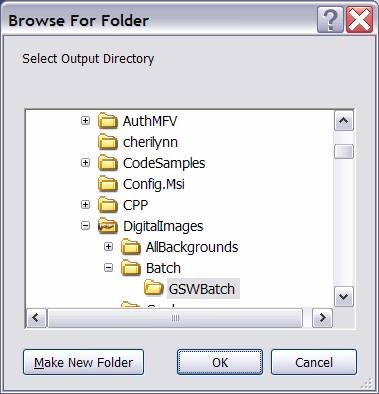
to use the same background with each photo. To do this we specify the directory
that has a foreground image as we’d like to merge. Then we specify the output
directory where we would like them to go, and then we start the batch. The
process will continue until every file in the batch folder has been merged.
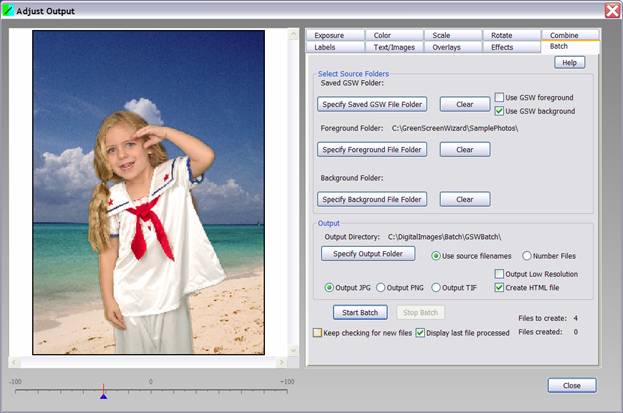
This dialog shows
the last file processed:

Here is the output
from the batch run.
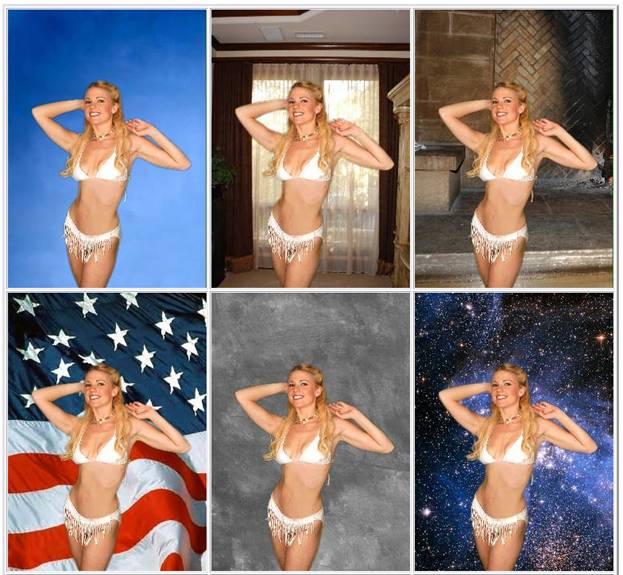
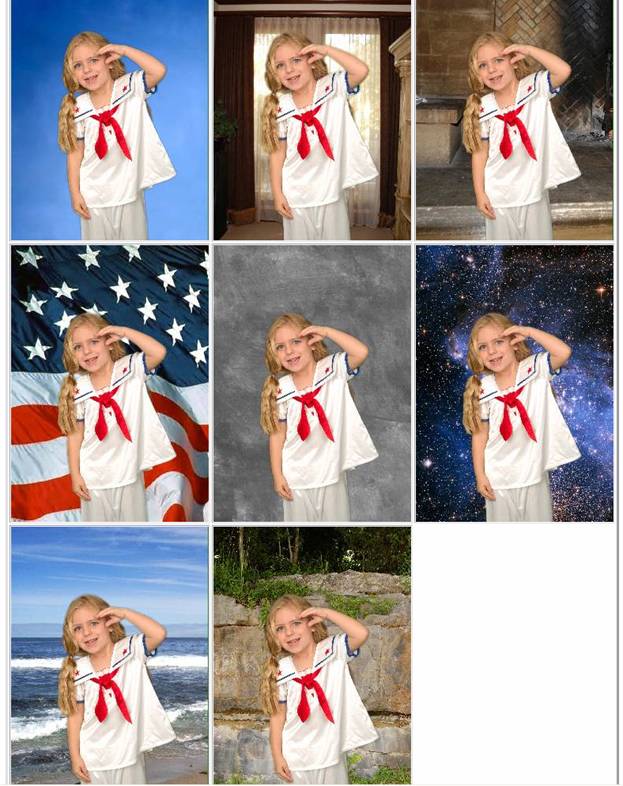
Next let’s
take our current image and replace the background with all of the backgrounds found
in a given directory. We do this by selecting the background directory and
running the background process.
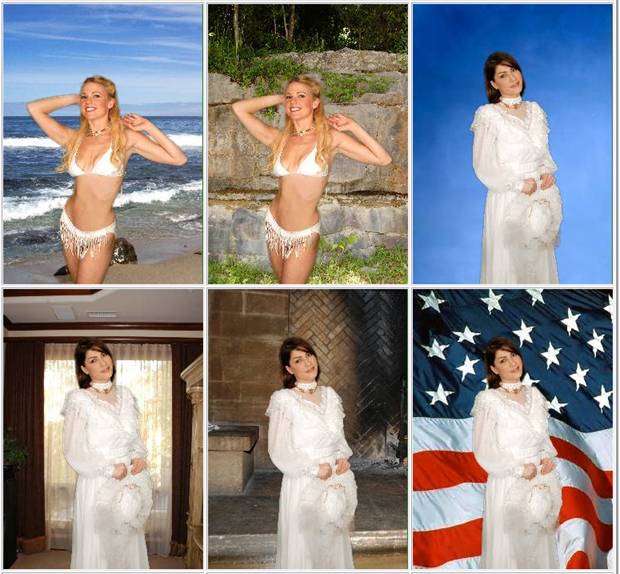
If we specify
both a foreground directory and a background directory, then for every foreground
an image is created with every background.
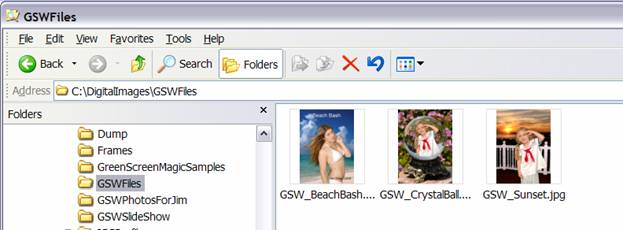
Now let’s
see what would happen if we specify a directory that has GSW files in it.
We choose to
let the GSW file override the background by checking the “Use GSW Background”.
Here’s
what the GSW files looked like.
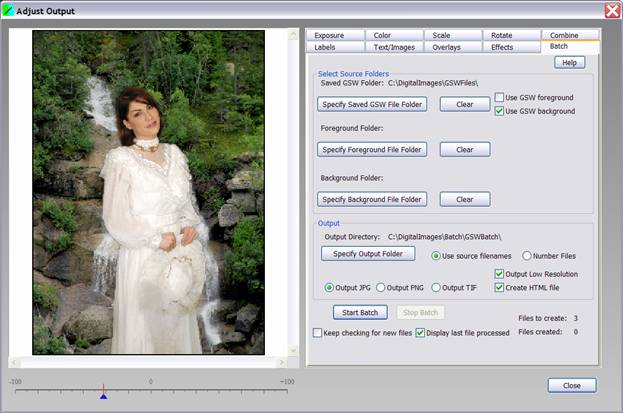
Here is the output
from the GSW batch.
Note how the
foreground image is scaled and shifted by the GSW files. Also text and overlays
can be added. With this ability you can create your best “looks,” and
then create output for each look.
Once a batch
process has created all of its files, the process terminates. If you check
the box that says “Keep Checking for New Files,” after the last file
is processed the batch system will sleep for 1 second, and then it will look to see
if there are any new files in any of the specified folders. If it finds one or more
it will process them and then display the last result in the last result box.
This is a handy feature if you’re doing tethered shooting. Every time the
camera stores a new file in a watched directory that file will be processed and
displayed.
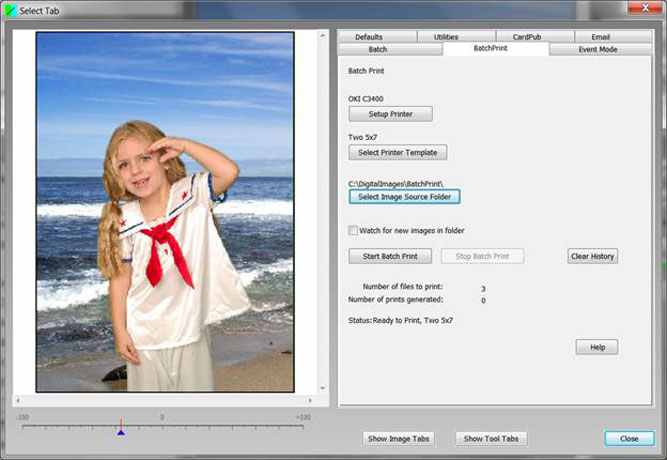
The Batch Process can create hundreds of images. The batch printing process was to created to allow you to simply and easily print these images out. You start this process by selecting the output printer. Next you select the printer template that you'd like to use for all of the images. You can pick a template that has more than one image on the page. Finally you select the folder of images you'd like to print. An indicator will show you how many images are to be printed. Simply click start and the printing will begin.
You can watch the folder for the arrival of new images. Each time a new image is found it will be printed. Images can be placed in the folder by other copies of GreenScreenWizard or by the batch process or if you're tethering your computer, tethering software.
Sending an e-mail with the green screen image attached has many advantages. First of all paper and ink are expensive so you save a lot of money on printing. An image that is e-mailed to a person can easily be forwarded to other people so if, for example you're creating an ad showing a person standing next to a car, it is in your best interest that these images be passed around.
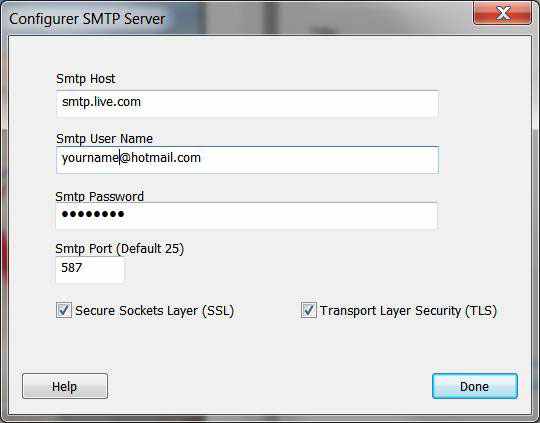
To use the e-mail feature you must first set up the mail server. Read the help file that is part of the mail server dialog to help you set this up. Once you have the server setup, you can put in a message for whatever event you're doing and then when you're ready to send an e-mail all you need is a person's e-mail address and away it goes.
Setup Email

Setup Email Server
Review Output
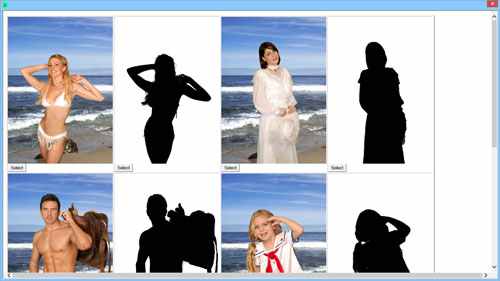
This feature was developed for a local school photography company that wanted to process 1000s of photos. To aid in the review of the batch this feature created a normal thumbnail and an alpha channel thumbnail. The reviewer looked to make sure that each image was ok. If a problem was noticed, the reviewer could simply click on the image and it will load that image into the editor.
Use Background Named Subfolders
The background folder will specify a group of background images. The foreground folder will point to a folder that contains subfolders.
Each subfolder will have a name that matches a file in the background folder.
If that name is not found the current background will be used.
To use this feature click the checkbox that says "Use background name subfolders".
Foreground_Folder
BKG1
o Forground1.jpg
o Forground2.jpg
o Forground3.jpg
BKG2
o Forground1.jpg
o Forground6.jpg
o Forground7.jpg
Background_Folder
o BKG1.jpg
o BKG2.jpg
Output_Folder
o Forground1BKG1.jpg
o Forground2BKG1.jpg
o Forground3BKG1.jpg
o Forground1BKG2.jpg
o Forground6BKG2.jpg
o Forground7BKG2.jpg
XML Batch File
In order to provide maximum flexibility in batching Green Screen Wizard created the XML batch file. It is intended that this file will be created with a program.
The file format described below will created an output image for each image specification in the xml file. If one of the fields in the image description is missing then the current setting is used. If the output folder does not exist it will be created. To create different image sizes and layouts simply create a series of GSW files with the sizes you want. If a GSW file is specified it will be appended to the filename.
To run the file click the "Use XML File" checkbox. Doing this will cause the system to search the input folder for XML files only. Once processed the system will copy the xml file to the SavedXML subfolder of the foreground folder and then delete the copy in the mail folder. If the check for new files checkbox is checked the system will look for new XML files.
File Layout
<image>
<gswfile></ gswfile>
<outputtransparency></outputtransparency>
<nogreenscreenprocessing></ nogreenscreenprocessing >
<bluescreenprocessing></ bluescreenprocessing >
<foreground></foreground>
<background></background>
<outputnamestyle></outputnamestyle>
<outputfiletype></outputfiletype>
<outputfolder></outputfiletype>
</image>
Notes:
The system used a simple parser. All xml field names must be lower case, no blanks and appear on the same line as the closing bracket
The following fields take yes or no
o outputtransparency
o nogreenscreenprocessing
o nogreenscreenprocessing
The output name styles are:
o combinefilesnames
o numberfiles
o createsubfolders
o outputfolderhasname - if this is set then the output folder already has the filename appended
The output file types are:
o outputjpg
o outputpng
o outputtiff
All file names require full path and name.
Example File
<image>
<gswfile>c:\Users\Ken\Documents\Green Screen Wizard\StartupFiles8\8x10300v.gsw</gswfile>
<outputtransparency>yes</outputtransparency><br />
<outputfiletype>outputpng</outputfiletype>
<foreground>c:\Users\Ken\Documents\Green Screen Wizard\SamplePhotos\Bride.jpg</foreground>
</image>
<image>
<gswfile>c:\Users\Ken\Documents\Green Screen Wizard\StartupFiles8\5x7300v.gsw</gswfile>
<outputtransparency>no</outputtransparency>
<outputfiletype>outputjpg</outputfiletype>
<foreground>c:\Users\Ken\Documents\Green Screen Wizard\SamplePhotos\Opening.jpg</foreground>
<background>c:\Users\Ken\Documents\Green Screen Wizard\Backgrounds\Demo\Flag.jpg</background>
<outputfolder>c:\Users\Ken\Documents\Green Screen Wizard\Ken\</outputfolder>
</image>